Point your domain to the server
Check your server’s IP address. It is better to use a static IPv4 address. Now you need to point your domain name to this IP address. For example: my-super-panel.com -> 193.122.122.122 There are two ways to do this:- Use a DNS provider (e.g. Cloudflare, Google Cloud, etc.)
- Use a registrar (e.g. Namecheap, etc.)
DNS Provider
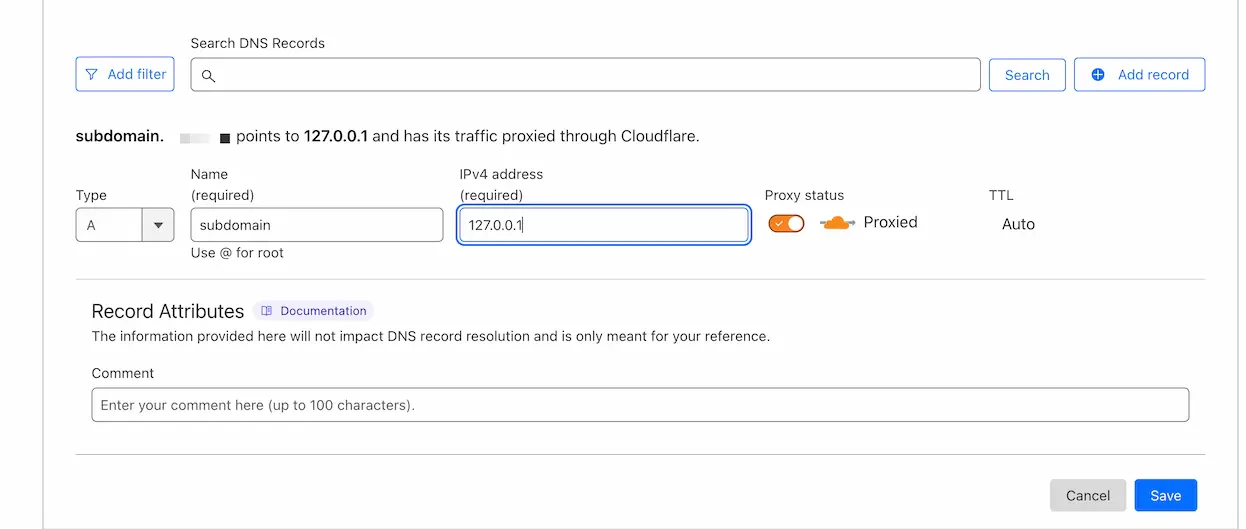
If you are using Cloudflare, you need to add an A/AAAA record (for IPv4 and IPv6 respectively) to your DNS records. Log in to your Cloudflare account here and select the desired domain. On the left side of the page, click on DNS and then click on Records. Click on Create record. Set the Type to A and the Name to @.If you want to use subdomains, enter the subdomain name (e.g.
bot) in the Name field.
There is an important difference between the yellow cloud (domain is proxied
by Cloudflare) and the grey cloud (domain is not proxied by Cloudflare) in
the Cloudflare control panel.If Cloudflare works fine in your region, it is recommended to proxy the
domain through Cloudflare (yellow cloud).
Nginx Configuration
You can set up Nginx on the same server as the Remnawave panel or on a separate server. Select the appropriate option below.📄️ Bundled
Bundled setup means Nginx will be configured on the same server as the
Remnawave panel.
📄️ Separate server
Installing on a separate server means that Nginx will be installed on a
different server than the Remnawave panel and other components.